728x90
반응형
- ec2 발급
- ufw 설정 및 port 구성도
- swap 메모리 설정
- docker 설치 (+ Ubuntu 기본 환경 세팅)
- docker-compose & jenkins 설치
- jenkins gitlab 연동(project-build) 및 플러그인 설치
- Nginx
- https 적용
- Jenkins Pipeline 작성
- S3 설치 및 설정
- RDS 설치 및 설정
https 적용
Certbot ????
: Let's encrypt를 이용해서 ssl 인증서를 발급, 갱신할 수 있게 도와주는 무료 오픈소스 툴
- Certbot을 따로 설치해도 되고, letsencrypt를 설치해도 됨(certbot이 포함되어있음)
인증서 발급(Let's Ecrypt)
- Let's Ecrypt는 이메일과 도메인만으로, 빠르게 인증서를 발급할 수 있는 무료 서비스
- Certbot을 통해서 받을 수 있음
certbot 설치
sudo snap install certbot-nginx
sudo apt-get update
sudo apt-get install python3-certbot-nginx
SSL(Secure Sockets Layer) ????
: Netscape Communications Corporation 에서 웹 서버와 웹 브라우저간의 보안을 위해 만든 프로토콜
공개키 / 개인키 대칭키 기반으로 사용함
무료로 사용할 수 있는 사이트
=> Let's Encrypt / AWS Certificate Manager
Nginx에 SSL 적용하기
sudo certbot --nginx -d {도메인}

ex)
sudo certbot --nginx -d sokdaksokdak.com
- 위의 명령어를 통해 인증서를 발급하면서 nginx에 인증서 관련 설정을 자동으로 할 수 있다
- 작성하면 Successfullu received certificate라는 안애와 함께 인증서 정보를 출력
/etc/nginx/sites-availble 경로로 가면 default라는 파일이 있는데 이 공간에 default 파일은 삭제하고 project.conf라는 이름을 가진 파일을 생성합니다(이름은 상관 없지만 위치는 저 위치여야 함)
server {
    listen 80;
    server_name k10d101.p.ssafy.io;

    # HTTP 요청을 HTTPS로 리다이렉트
    location / {
        return 301 https://$host$request_uri;
    }
}
server {
    listen 443 ssl; // 443 포트의 요청을 받음
    server_name k10d101.p.ssafy.io; // 도메인 지정

    include /etc/nginx/conf.d/service_url.inc;

    ssl_certificate /etc/letsencrypt/live/k10d101.p.ssafy.io/fullchain.pem; # SSL 인증서
    ssl_certificate_key /etc/letsencrypt/live/k10d101.p.ssafy.io/privkey.pem; # SSL 키
    include /etc/letsencrypt/options-ssl-nginx.conf; # SSL 옵션
    ssl_dhparam /etc/letsencrypt/ssl-dhparams.pem; # DH 파라미터

     # Frontend: 정적 파일 서빙 및 SPA 라우팅 지원
    location / {
        proxy_pass http://localhost:3000; # Docker 서비스 이름 사용
        proxy_http_version 1.1;
        proxy_set_header Upgrade $http_upgrade;
        proxy_set_header Connection "upgrade";
        proxy_set_header Host $host;
        proxy_set_header X-Real-IP $remote_addr;
        proxy_set_header X-Forwarded-For $proxy_add_x_forwarded_for;
        proxy_set_header X-Forwarded-Proto $scheme;
    }

     # Backend: API 요청
    location /api/ {
        proxy_pass $service_url; # Docker 서비스 이름과 포트 사용
        proxy_http_version 1.1;
        proxy_set_header Host $host;
        proxy_set_header X-Real-IP $remote_addr;
        proxy_set_header X-Forwarded-For $proxy_add_x_forwarded_for;
        proxy_set_header X-Forwarded-Proto $scheme;
        proxy_set_header Connection "close"; # API 요청에는 'Connection: upgrade' 불필요
    }
}
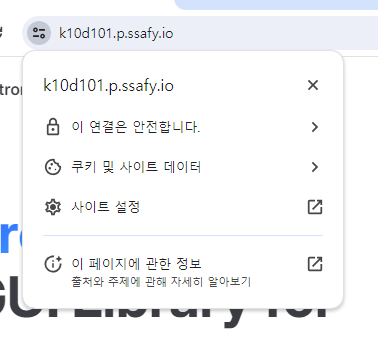
$ sudo service nginx restart
명령어를 통해 nginx를 재시작하면...
참고
https://velog.io/@byeongju/HTTPS-%EC%A0%81%EC%9A%A9%EA%B8%B0
728x90
반응형
'Devops' 카테고리의 다른 글
| 배포 정리하기(3) Nginx 설치 (0) | 2024.05.14 |
|---|---|
| 배포 정리하기 (2) docker, docker-compose 설치 (0) | 2024.05.14 |
| 배포 정리하기 (1) ec2 발급, ufw 설정, swap 메모리 설정 (0) | 2024.05.07 |